这两天学习了axis2的自定义模块
大概理了一下,其步骤大概为以下8步
1,编写我们的axis2的客户端和服务端
2,编写我们的Module类,即实现Module接口的类
3,编写我们的Handler类,即继承了AbstractHandler并且实现了Handler接口
4,编写我们的module.xml文件
5,修改我们的的services.xml中
6,修改我们的axis2.xml文件
7,发布模块和发布我们的webservice
8,测试
下面我们就开始吧
第一:编写webservice
本例就是一个简单的webservice,如果发布webservice这里就不在说明了
,这里我们假设我们编写好了webservice
第二:编写我们的module类
import org.apache.axis2.AxisFault;
import org.apache.axis2.context.ConfigurationContext;
import org.apache.axis2.description.AxisDescription;
import org.apache.axis2.description.AxisModule;
import org.apache.axis2.modules.Module;
import org.apache.neethi.Assertion;
import org.apache.neethi.Policy;

public class loggingmodule implements Module{

	@Override
	public void applyPolicy(Policy arg0, AxisDescription arg1) throws AxisFault {
		// TODO Auto-generated method stub

	}

	@Override
	public boolean canSupportAssertion(Assertion arg0) {
		// TODO Auto-generated method stub
		return false;
	}

	@Override
	public void engageNotify(AxisDescription arg0) throws AxisFault {
		// TODO Auto-generated method stub

	}

	@Override
	public void init(ConfigurationContext arg0, AxisModule arg1) throws AxisFault {
		System.out.println("init 我进来了哦");

	}

	@Override
	public void shutdown(ConfigurationContext arg0) throws AxisFault {
		System.out.println("shutdown 我走了哦");

	}

}
上面的代码我们仅仅简单的实现了init方法和shutdown方法
需要注意的是,前面两个方法中有Policy和Assertion类,这两个类在包org.apache.neethi 中,即我们需要下载jar包
neethi-3.0.1.jar ,本站提供了该jar的下载 https://www.bugkong.com/archives/2015_11_564.html
在tomcat启动的时候会首先初始化这个类,就是说启动的时候我们在tomcat的控制台看见“ init 我进来了哦” ,关闭tomcat的时候就会运行shutdown方法
第三:开始编写我们的Handler类,需要继承AbstractHandler并且实现Handler接口
改实现类中 invoke方法是必须的
package study.ws.newmodules;

import org.apache.axis.handlers.LogHandler;
import org.apache.axis2.AxisFault;
import org.apache.axis2.context.MessageContext;
import org.apache.axis2.engine.Handler;
import org.apache.axis2.handlers.AbstractHandler;
import org.apache.commons.logging.Log;
import org.apache.commons.logging.LogFactory;

public class logHandler extends AbstractHandler  implements Handler{
	private static final Log log = LogFactory.getLog(LogHandler.class);

	@Override
	public InvocationResponse invoke(MessageContext arg0) throws AxisFault {
		log.info(arg0.getEnvelope().toString());
		return InvocationResponse.CONTINUE;
	}

	@Override
	public void flowComplete(MessageContext mc){
		mc.getServiceContext().setProperty("login", "OK");
		System.out.println(mc.getServiceContext().getProperty("login").toString()+" 消息来了");
	}

}
上面的Handler实现类中,flowComplete方法是每次执行完一次handler后都会执行该方法,比如消息发出,消息收到,错误消息发出,错误消息收到等
后面我们在配置module.xml的时候再详细说明
第四:配置我们的module.xml文件
该文件存在于我们工程目录的METE-INF目录中,如果没有请执行创建
module.xml文件极其简单,看看我的实例,我再解释下
<?xml version="1.0" encoding="UTF-8"?>
<module name="logging" class="study.ws.newmodules.loggingmodule">
    <InFlow>
        <handler name="InFlowLogHandler" class="study.ws.newmodules.logHandler">
            <order phase="loggingPhase"/>
        </handler>
    </InFlow>
    <OutFlow>
        <handler name="OutFlowLogHandler" class="study.ws.newmodules.logHandlerout">
            <order phase="loggingPhase"/>
        </handler>
    </OutFlow>
    <OutFaultFlow>
        <handler name="FaultOutFlowLogHandler" class="study.ws.newmodules.logHandlererror">
            <order phase="loggingPhase"/>
        </handler>
    </OutFaultFlow>
    <InFaultFlow>
        <handler name="FaultInFlowLogHandler" class="study.ws.newmodules.logHandlererrorout">
            <order phase="loggingPhase"/>
        </handler>
    </InFaultFlow>
</module>
module 中的name表示我们的模块名称是 logging
InFlow和OutFlow表示成功时我们运行的handler
InFlow表示客户端收到的消息,如果收到消息就执行class标记的类中的方法flowComplete
OutFlow表示发出一个消息,就执行相应的class标记的类中的方法flowComplete
同样的,下面两个表示错误的,失败的,执行的handler
相信大家也看到了,我的xml中定义的class,4个class都是不一样的。但是他们都是Handler的实现类,并且都实现了invoke方法和flowComplete方法
第五:修改我们的services.xml文件,主要是向文件中增加一段代码,以表示我们创建的模块和我们的webservice类有关联
在service标签下面增加代码
<module ref="logging" />
<?xml version="1.0" encoding="UTF-8"?>
<service name="modules_one_test_xml" scope="application">
	<module ref="logging" />
	<parameter name="ServiceClass">study.ws.modules.one.test.speak</parameter>
	<operation name="getName" mep="http://www.w3.org/2006/01/wsdl/in-out">
		<messageReceiver class="org.apache.axis2.rpc.receivers.RPCMessageReceiver" />
	</operation>
</service>
第六:修改我们的axis2.xml
该文件在 tomcat目录中
Tomcat 8.0\webapps\axis2\WEB-INF\conf
在axis2.xml文件搜索phaseOrder节点,此节点也有4个
您可以在</phaseOrder>的上面添加代码
<phase name="loggingPhase"/>
我这里粘贴部分代码,注意,应该是4个哦
    <phaseOrder type="OutFlow">
        <!--      user can add his own phases to this area  -->
        <phase name="soapmonitorPhase"/>
        <phase name="OperationOutPhase"/>
        <!--system predefined phase-->
        <!--these phase will run irrespective of the service-->
        <phase name="RMPhase"/>
        <phase name="PolicyDetermination"/>
        <phase name="MessageOut"/>
        <phase name="Security"/>
        <phase name="loggingPhase"/>
    </phaseOrder>
大家很容易发现 type里面的参数和module.xml的节点是一样的
在我们的module.xml中,我们的<order phase="loggingPhase"/> 是一样的,所以我们这里也应该是一样的
就是说,这里您可以更改module.xml中的phase的值,但是您在配置axis2.xml的时候必须要保持一致,否则会出错的
第七:发布
发布需要发布两个包,发布的方法都是一样的,一个是webservice 一个是模块,需要注意的是模块是需要发布成mar格式的
如果用到了jar包,需要一起打包发布
webservice的结构是
[caption id="attachment_573" align="alignnone" width="598"] 发布webservice[/caption]
模块的结构如图所示:
[caption id="attachment_574" align="alignnone" width="578"]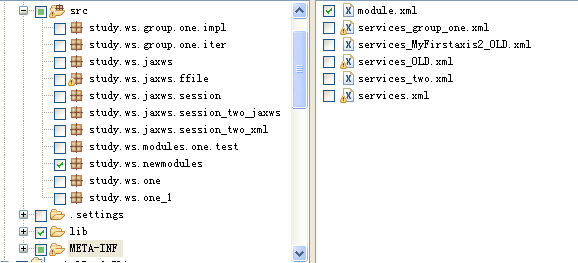 axis2模块[/caption]
需要说明的是,模块的名称可以为logging.mar
模块发布到Tomcat 8.0\webapps\axis2\WEB-INF\modules 这个目录中
如果这个目录中有modules.list文件,请用文本编辑器打开
在最下面加上我们的模块名
[caption id="attachment_575" align="alignnone" width="330"] modules.list 添加模块[/caption]
第八:测试
现在我们运行tomcat,并且发布客户端
运行我们客户端的测试代码
public class modules_one {

	public static void main(String[] args) {
		Modules_one_test_xmlPortTypeProxy ptp = new Modules_one_test_xmlPortTypeProxy();
		try {
			System.out.println(ptp.getName("小黑猫啊"));
		} catch (RemoteException e) {
			// TODO Auto-generated catch block
			e.printStackTrace();
		}
	}

}
在eclipse我们获得了正确的消息,在tomcat的控制台,我们也获取了我们需要的信息
初始化了模块,在tomcat控制台打印出了“ init 我进来了哦 ”
[caption id="attachment_576" align="alignnone" width="634"] 初始化模块[/caption]
以下代码测试了我们客户端运行代码,所显示的信息,首先执行了handler发出消息,在执行了handler的接收消息
[caption id="attachment_577" align="alignnone" width="643"] axis2 soap消息[/caption]
我也是小白,欢迎您与我共同学习 进步
爆款云服务器s6 2核4G 低至0.46/天,具体规则查看活动详情